This 5-minute trick guarantees crispy crusts and killer grill brands
:max_bytes(150000):strip_icc():format(jpeg)/20250724-GrillingCleanTip-LorenaMasso-01-79e03c225ced4dd1bc185be78c017ed5.jpg)
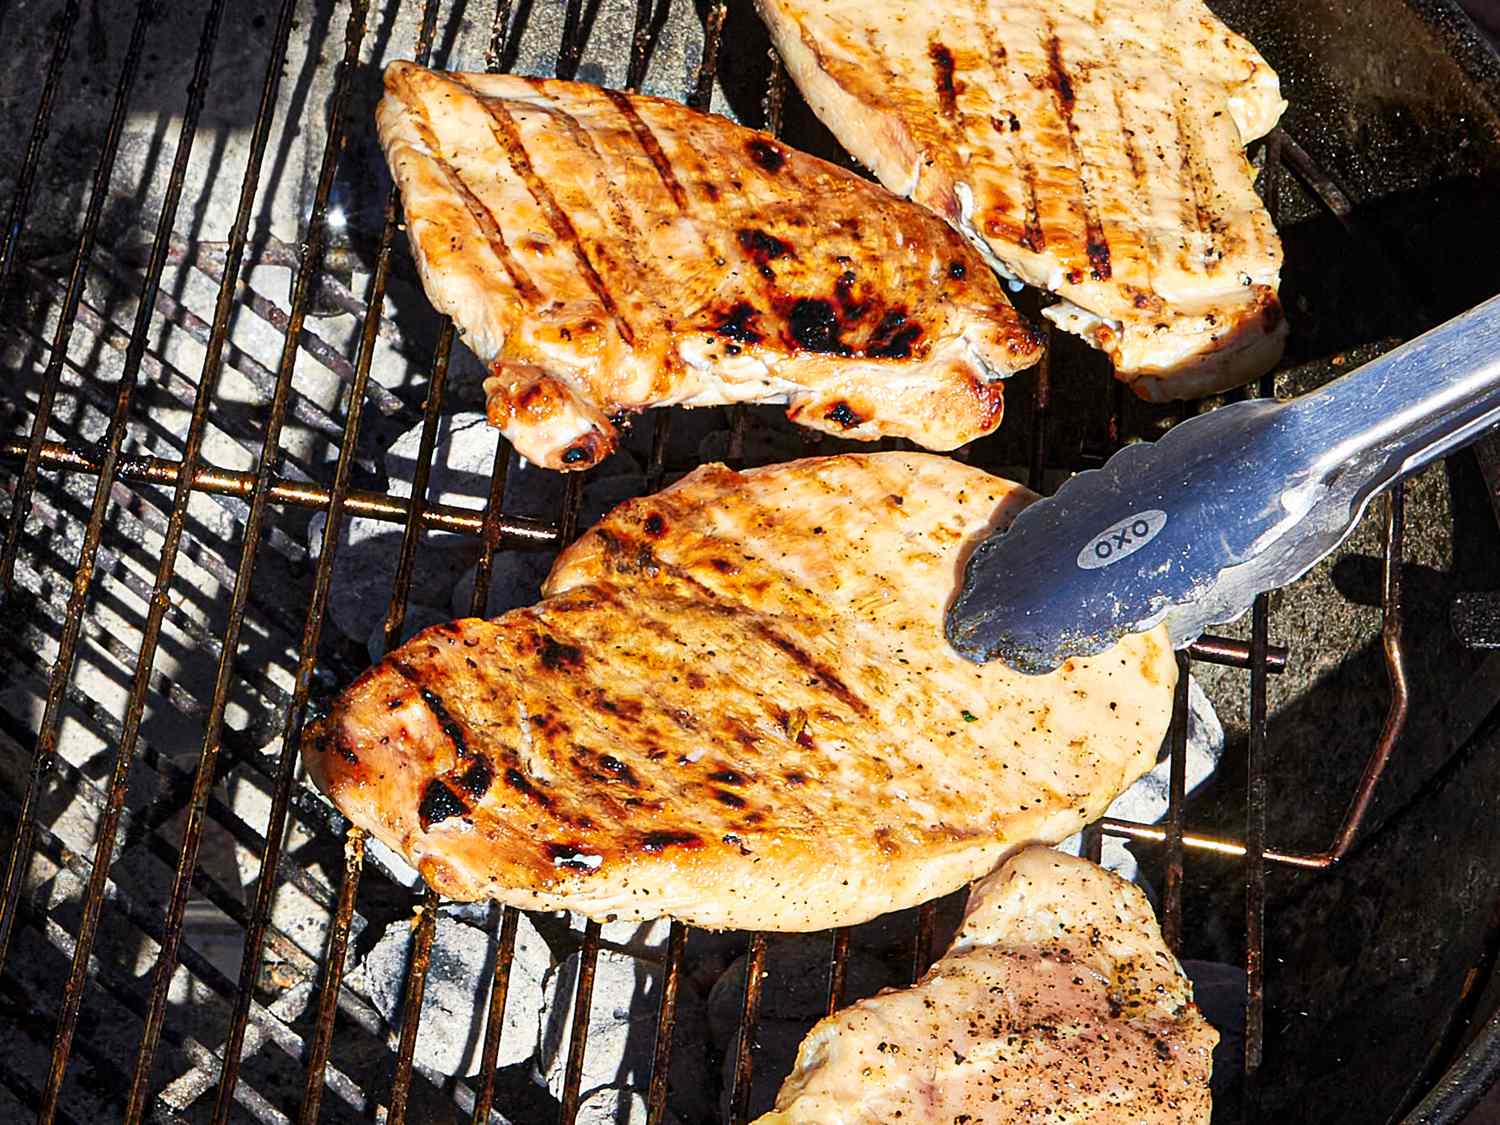
Avoid stuck food and grill disasters with this three-stage method: Preheat the grids, clean them thoroughly and oil them as it is hot. It only takes five minutes, but it makes the difference between grilling the glory and a mutilated chaos.
I don’t take much seriously in life. I am known to crack an amazingly inappropriate joke during a medical emergency or roast myself from my children just to keep the mood light. But I’ll give one thing never Joke over: mutilated food on the grill.
It is a serious business to make these beautiful, photo-op-up grill tracks that turn a simple chicken breast or a simple zucchini plate into a show stopper. There is nothing to laugh to ensure that the Ribeye is developed and cleaned cleanly. And I ruined enough meals with stuck disorder to know exactly how frustrating it is.
They go to turn the beautiful chicken legs that they marinate for hours and already imagined the perfect grill tracks. But if you turn it around, disasters beat. The chicken is completely tight. They try to get rid of it, but it just tears and makes it worse. Now half of it is liable on the rust, and the other half looks as if it has been entered by Wolverine. To be honest, if you have reached this point, all hope hopes Is Lost and it’s okay if you shed one or two tears.
But after many years that have perfected my grill game in both professional and personal contexts, I can confidently say that this heartache is completely avoidable. It only takes about five minutes and three simple steps (preheating, cleaning and oiling the grill) to reach an activity grille surface.
The 3-stage method for a non-stick grille
At first glance, these steps seem like no brain, but many people are routinely skipping one or more. All three matter and together they make the difference between a clean flip and a frustrating chaos.
Step 1: Preheat up to hot
Many domestic chefs assume that their grill is adequately preheated just a few minutes after lighting. However, if you do not give enough time to heat the grids thoroughly, do not sit down on success. It is far more likely that groceries hold on cold or lukewarm grids.
If the grids are not hot enough, moist raw proteins are more likely to combine with the metal before the surface of the meat can fry and dehydrate. It is this initial flood fire that ensures that the food releases are later clean. A properly preheated grill almost immediately evaporates the surface moisture and denied proteins that are in contact with it, and forms a crust that is slightly attracted when it is time to flip.
The steps for proper preheating are as follows:
- For a charcoal grille: Light the coals in a chimney starter and wait until they are fully inflamed, glowed red and slightly covered with gray ash. Pour the hot coals into the grill, set the ventilation slots for the airflow, cover them with the lid and let it preheat for about 5 minutes or until it reaches your desired grill temperature.
- For a gas grill: Turn all the burners with an open lid to ignite the grill. Then close the lid and let it preheat for about 15 minutes or until the inner temperature hits your target cooking area.
If the grill is properly preheated, food not only sticks less, but also guarantees the photogenic grill tracks that we all want to eat with our grilled food.
Step 2: scratch the grids cleanly
As soon as your grill is hot, it’s time to scratch your grids. Don’t wait until after cooking to clean the grill – this step should be carried out right after the food continues. All crispy remains of your last cookout become the main adhesive material. So it is best to remove them.
A Gout quality grill Is your best friend here. Search for a long grip and robust bristle or search. Some people worry about loose metal bristles that end up at the belts (and then yikes, in the food), but this is usually just a problem with worn or cheap brushes. If you invest in a solid and replace it as soon as the bristles collapse, you are clear. (It is also a good habit of taking care of the brushes, just to check whether the brush itself has left nothing undesirable.)
If you are a brushaver-or only your friends want to impress on Instagram-I will admit that the onion hack also works. To do this, cut a large onion in half, stab on the end of a long fork and scrub the flat cut side of the onion over the hot grilles. The moisture and mild acid help to dampen and lift the bits. Yes, it is charming and it smells great, but if you don’t want to sacrifice your onions to the cleaning gods, a brush (or even a foil packed) will do just as well without wasting food.
The goal is simple: start with a clean, mere metal that is ready for the next step.
Step 3: Oil the grids (if you are hot)
If my anecdotal experience is correct, this is the step that most people skip, especially if you have already covered your food with oil or a marinade. And sure, it may seem superfluous to oil the grids when their chicken legs are already as high as if they are leading to a tanning bed. But skipping this step is still a mistake.
The oiling of the hot grid creates a thin, even film that connects to the metal and is like a cast iron pan like a half-non stick layer. This layer helps to ensure that your food is released cleanly, even if your marinade or dry spots have gaps on the surface. It is an insurance policy with a low load against tearing, gluing or loss of this precious crust that you have worked so hard to build them.
To do it right, take a folded paper towel after the clean and blazing grille, dip it into a neutral, high smoke oil (e.g. don’t overdo it; too much oil can lead to flare up. A light slot is everything you need.
It only takes a minute, but this step makes a big difference, especially if you cook lean proteins such as chicken breast, fish or shrimp that tend to stick the most.
Take away
Five minutes of preparation – proceed, clean and oil – can save your dinner and your dignity. It is easy to assume that the stick is only part of the grilling, but it doesn’t have to be that way. Only a few minutes of care in advance means that you can turn around with confidence, serve with pride and maybe even earn a few braggling rights how good your meal looks like.